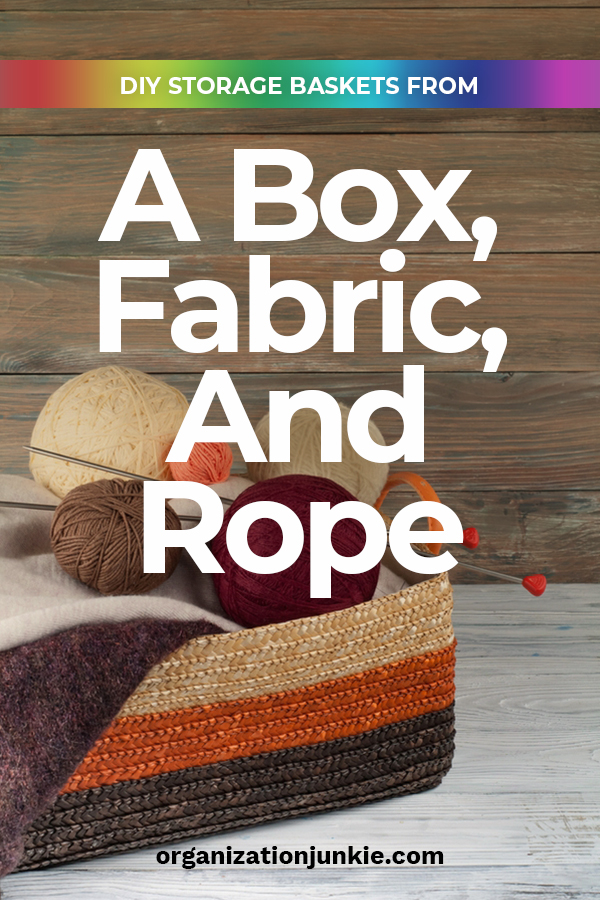
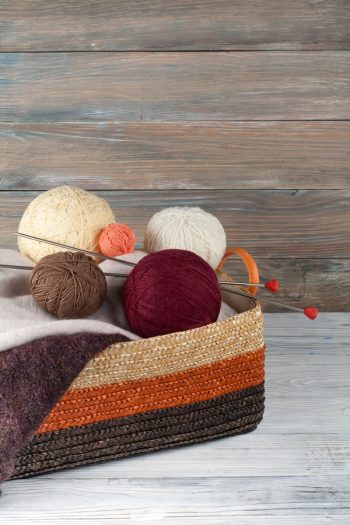
For organization hacks and storage ideas, you’ve come to the right place! Today at Organization Junkie, I’m showing you how to create your own DIY storage baskets from a box, fabric and rope. You won’t believe how easy and inexpensive this project is. Are you ready to create some amazing storage baskets no one will believe you made yourself? I am!
DIY Storage Baskets
Anywhere you look these days, people are using fabulous storage baskets to organize their cupboards and shelves. But you don’t have to spend a mint buying enough storage baskets for your organization needs. All you need is a box, some fabric, and rope.

Save those cardboard boxes! Any size box works perfectly for this project. A shoe box makes a small basket for a small space. If you need a large basket, start with a large box. All you have to do is capture the vision of what that plain old box is about to become!

The fun part of this project is the rope. Rope is what makes your DIY storage basket look like a basket. The fun thing is that rope is available in tons of different colors, so your design options are pretty endless.
As for the fabric, choose from fabric you have leftover from other projects, or choose fabric that coordinates with your choice of rope. The fabric lines the inside of the box, so just be sure you have enough to line the box and extend a little over the sides. If you don’t want to create a fabric liner for your basket, just line the inside with rope after you cover the outside.
How To Make DIY Storage Baskets
- First, prepare your cardboard box. If the box has flaps extending over the top, just cut those off. All you need is a box with sides, a closed bottom, and an open top.
- Measure the dimensions of the box to get the measurements for your lining. Cut the fabric to fit. Remember to allow a little extra for a seam allowance.
- Pin the fabric together to form the shape of the box. Sew it together and then slip it into the box. Fold the sides over the top and use hot glue to secure it along the outside top edge.
- Grab your rope, and starting at the bottom of one long side, wrap your box in rope from bottom to top. Use hot glue to secure it as you go.
- When you’re finished, the only place where cardboard will be visible is the bottom. And no one will see it!
- If desired, fashion handles from the rope and glue one at the top of each short side.
See how easy it is to create DIY storage boxes? Come back and share your finished projects!

Leave a Reply